Welcome to digital planning! So you put Notability on your iPad and downloaded your digital planner file….. now what? This is a visual walkthrough on how to get things set up and ready to go. Let’s get down to it!
How to import your planner file:

Step 1: Open Notability
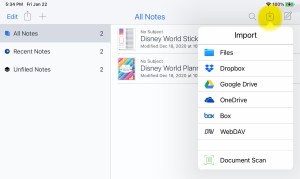
This is Notability’s home page. When you open the app, you’ll see the planners and notes that you have in the right column.
The app allows you to assign different categories to your notes (school, journal, business, etc.) and will list the categories in the left column.
Step 2: Import your file
To import your planner into the app, click on the import icon in the top right corner (highlighted in yellow).
Then select the location of your file, and then the file itself.
Step 3: Create your note
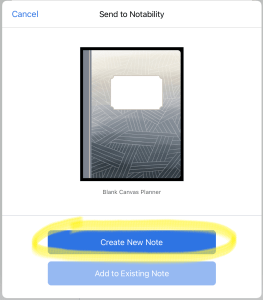
This screen will pop up when you select your file. Go ahead and click on “Create New Note.”
Step 4: Import the Note
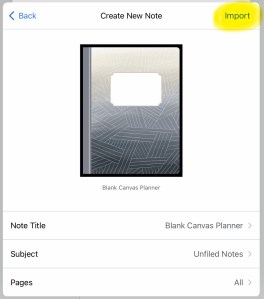
This screen will pop up next. This is where you can change the title of your note, assign a subject to it, and select the pages you want.
Click on “Import” when you’re done, and then press “done” to close out the screen.

Step 5: Ta-da!
You should now see your new note listed on the home page.
How to Change the Page View:
Notability gives you 2 options on how to view your file: Seamless and Single Page.
Seamless is when you scroll vertically (up & down).
Single Page is when you scroll horizontally (left and right).
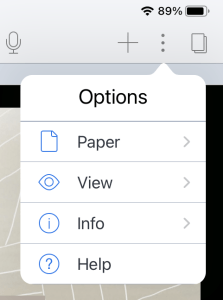
To change the way you want to view your file, click on the 3 dots in the upper right corner of the app and select “view”.
How to Delete, Copy, and Paste Pages
Studio Battleaxe planners come with a ton of page options, and the real beauty of digital planning is how easy it is to customize your notebook. Delete what you don’t want. Copy and page you like and use it over and over again.
Please keep in mind that interactive planners – planners with clickable tabs – are programmed a specific way. Page A will ONLY jump to Page B, so if you delete Page B…. that button no longer works and there’s no fixing it on your end. Studio Battleaxe planners have a delete warning on the top of every page that is connected to a link, so you don’t accidentally delete something you shouldn’t.

To Delete, Copy and Paste Pages
Click on the icon in the top right corner of the page to enable page view. You will see every page in the planner listed on the right column. Each page has 3 small dots in the corner. Click on those 3 dots and you get the options to delete, copy, and paste pages.
How to Add Stickers
Adding images from your device
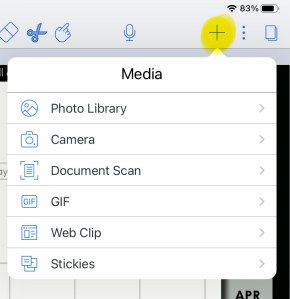
Click on the + sign in the top right corner and select “photo library.” Find the image you need and click on it.
You also have options to take a photo with your camera, add a gif from Notability’s gif library, add plain sticky notes, and selecting a clip from the internet.

Adding Images from a Cloud
I keep all my stickers on a cloud, and I had the hardest time figuring out how to add them to my Notability planner without having to download hundreds of pictures to my iPad.
The easiest solution is to do a split screen with Notability on one side and your cloud app on the other. Then just drag and drop those stickers!
If you don’t know how to do a split screen on your iPad, check out this video on YouTube: https://www.youtube.com/watch?v=nSBZKr5kXYM

Moving and Editing Images
To move or edit images, click on the scissors tool and then click on the image. You will get a pop up window with options to crop, copy and delete an image. You can resize an image by dragging the corners.

Leave a comment